
The soul conductor is a powerful transport block. Attaching two conductors with sculk and clicking one will transport you to the other. There are also complex mechanics involving more than two conductors (described below).
The soul conductor also has redstone interactions. When powered, it deactivates and cannot be entered nor exited. Any sculk that the conductor scans during the transport will trigger observers pointing into said sculk.
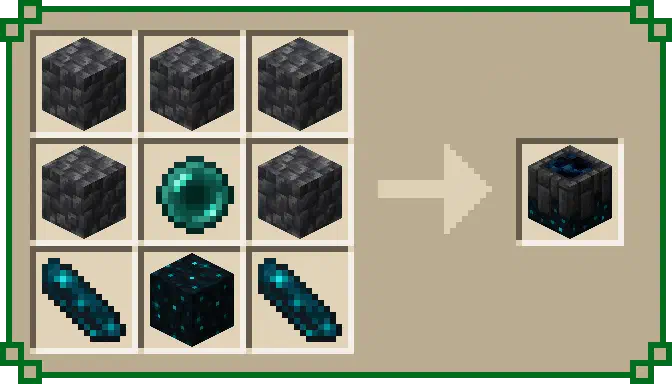
It’s crafted using two echo shards, making it a powerful, unique reward for the deep dark.
Advanced Soul Conducting
Before working with the advanced mechanics of soul conductors, you first need to understand the basics. They’re pretty much pipes. Connect the conductor ends together with sculk blocks, and you have a working transport system.
Clicking one end of a pipe system will transport you to the other end. This works both ways. However, there are several limitations:
- The path the soul conductor takes cannot be more than 2000 blocks long
- This limit can be edited by using the below command:
/scoreboard players set #soul_conductor_limit tcc.dummy <number>- Be warned, any travel greater than 2000 blocks is likely to cause large amounts of lag.
- This limit can be edited by using the below command:
- There must be at least one block of sculk between the conductors
- There must be a valid exit at the other end. It cannot be blocked by solid blocks.
- There must be a soul conductor at each end. This one should be pretty obvious. You can’t go through a pipe if there’s no opening at the other end.
If these conditions are not met, clicking the conductor will make a failure noise and you will not teleport to the other end.
The Priority System
You should’ve expected something like this… it’s a feature with its own massive article, of course it’s going to have another ridiculously complex system to go with it.
In order to understand this system, you first need to know that distance is not a choice factor whatsoever. If you come in the discord asking why your soul conductor is “going to the wrong output” and mention something about “but this one is closer than this one” I will call you an “absolutely hollow-brained waste of space of a human being.” This is a promise.
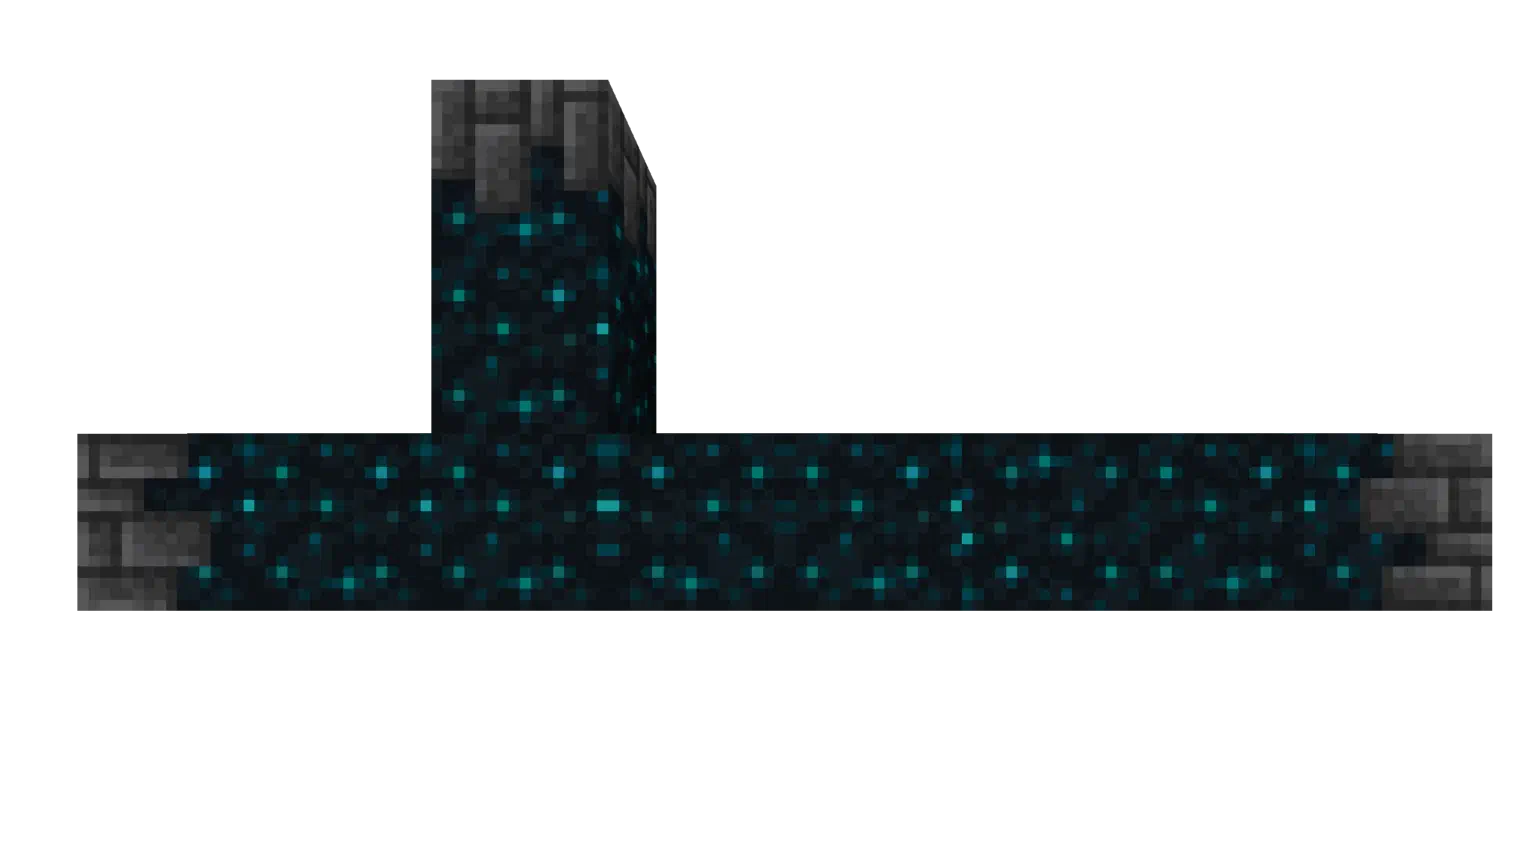
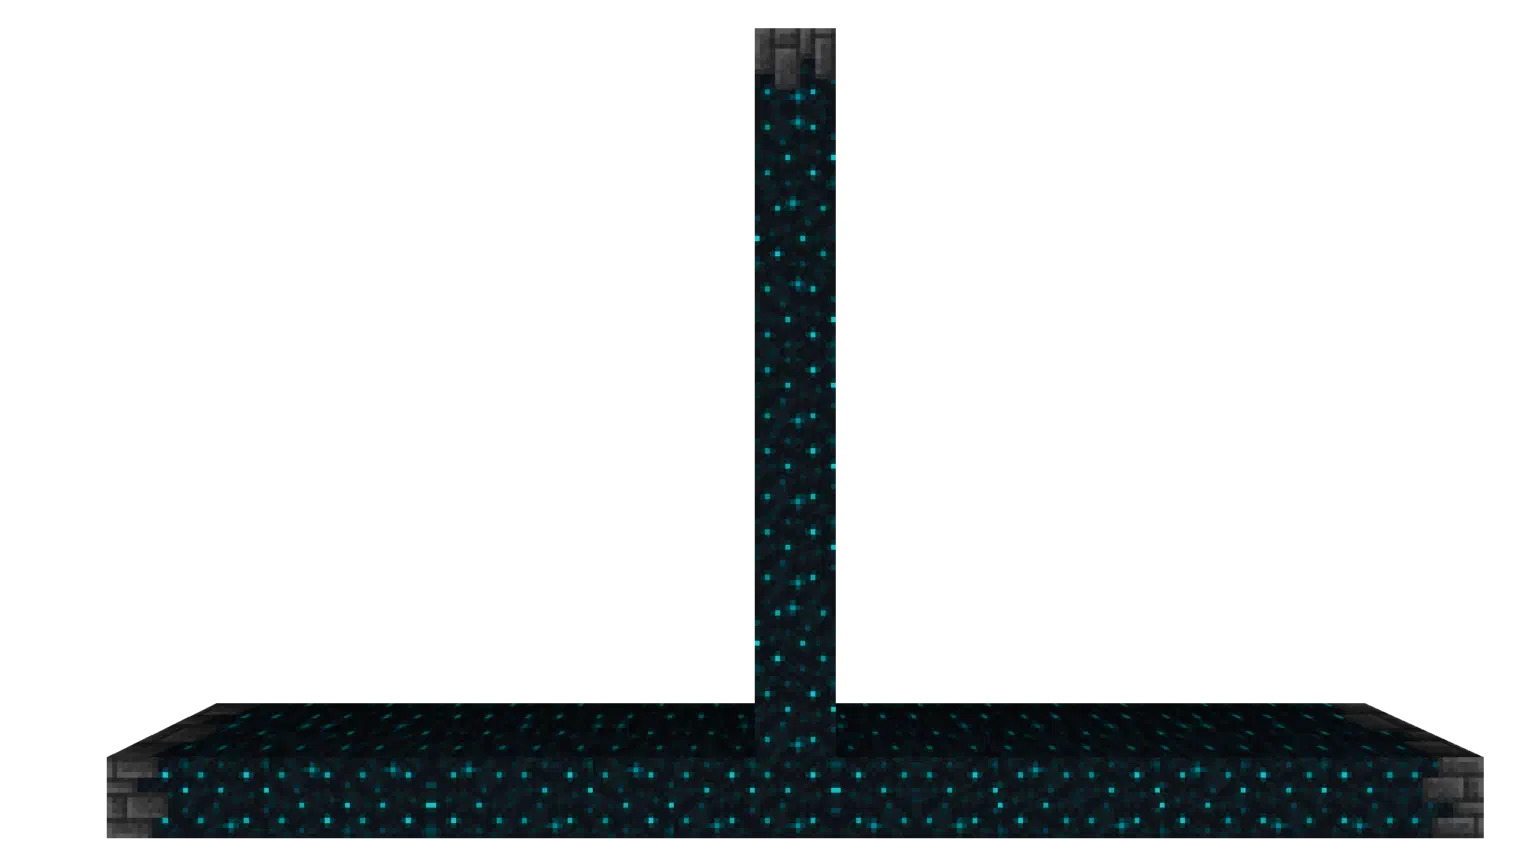
The above two are logically equivalent and will have the exact same results when travelling through their systems. Distance is irrelevant.
So what is relevant? The choices the path makes, and how it decides to make those choices. It’s all centered on the ‘priority’ system. Simply, the entry conductor would like to transport you to the exit conductor that takes the least effort to get to. It prioritizes moving in the “easiest” direction to move in.
The priority order is as follows:
- Down
- Forward
- Left/Right (Chosen randomly)
- Up
- Backward
Simple Priority
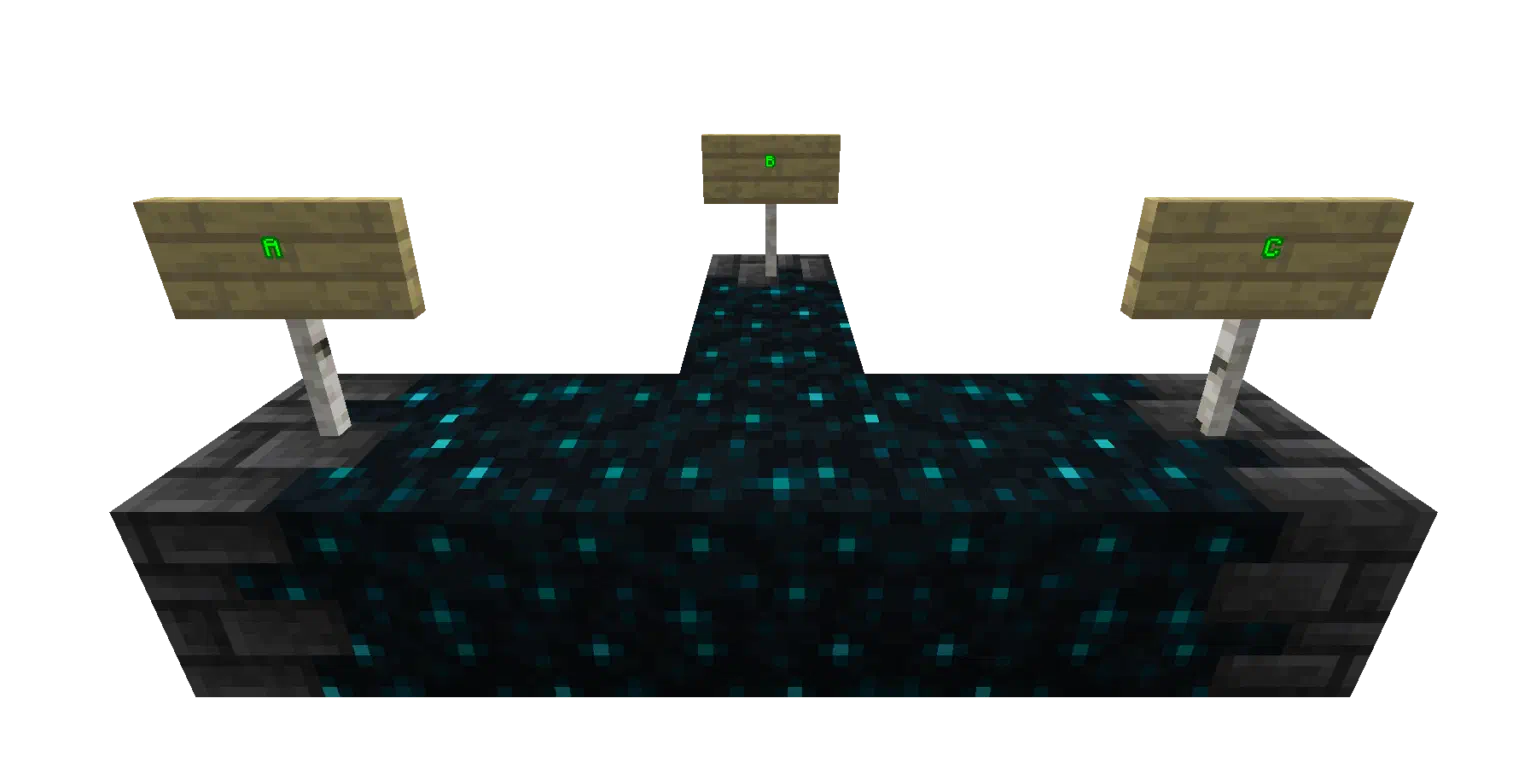
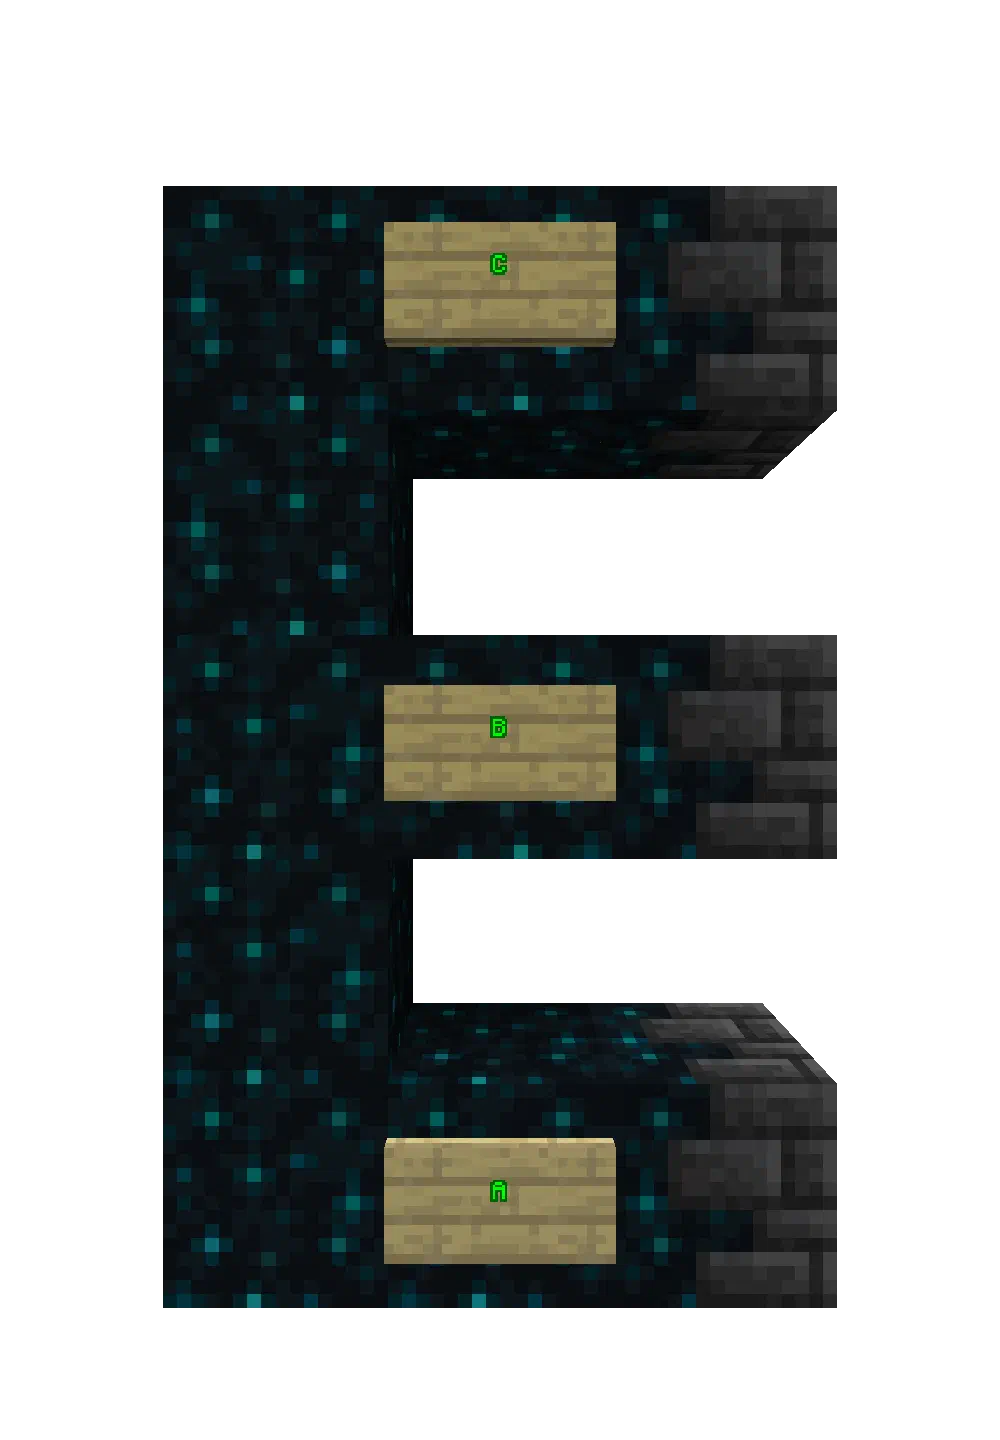
Example #1, Simple Priority. The signs read “A”, B”, and “C” from left to right.
Example #1 above is designed to help you understand the basics of the priority system.
- Clicking on A will send you to C, and never to B in the middle. This is because going from A to B requires a left turn, but going from A to C only requires moving forward. Since moving forward is prioritized over turning left/right, it moves forward and always ends up at C.
- Clicking on C will always send you to A, for the same reason described in the above bullet point.
- Clicking on B will send you to either A or C. This is because it chooses between turning left and right randomly.
Abstraction
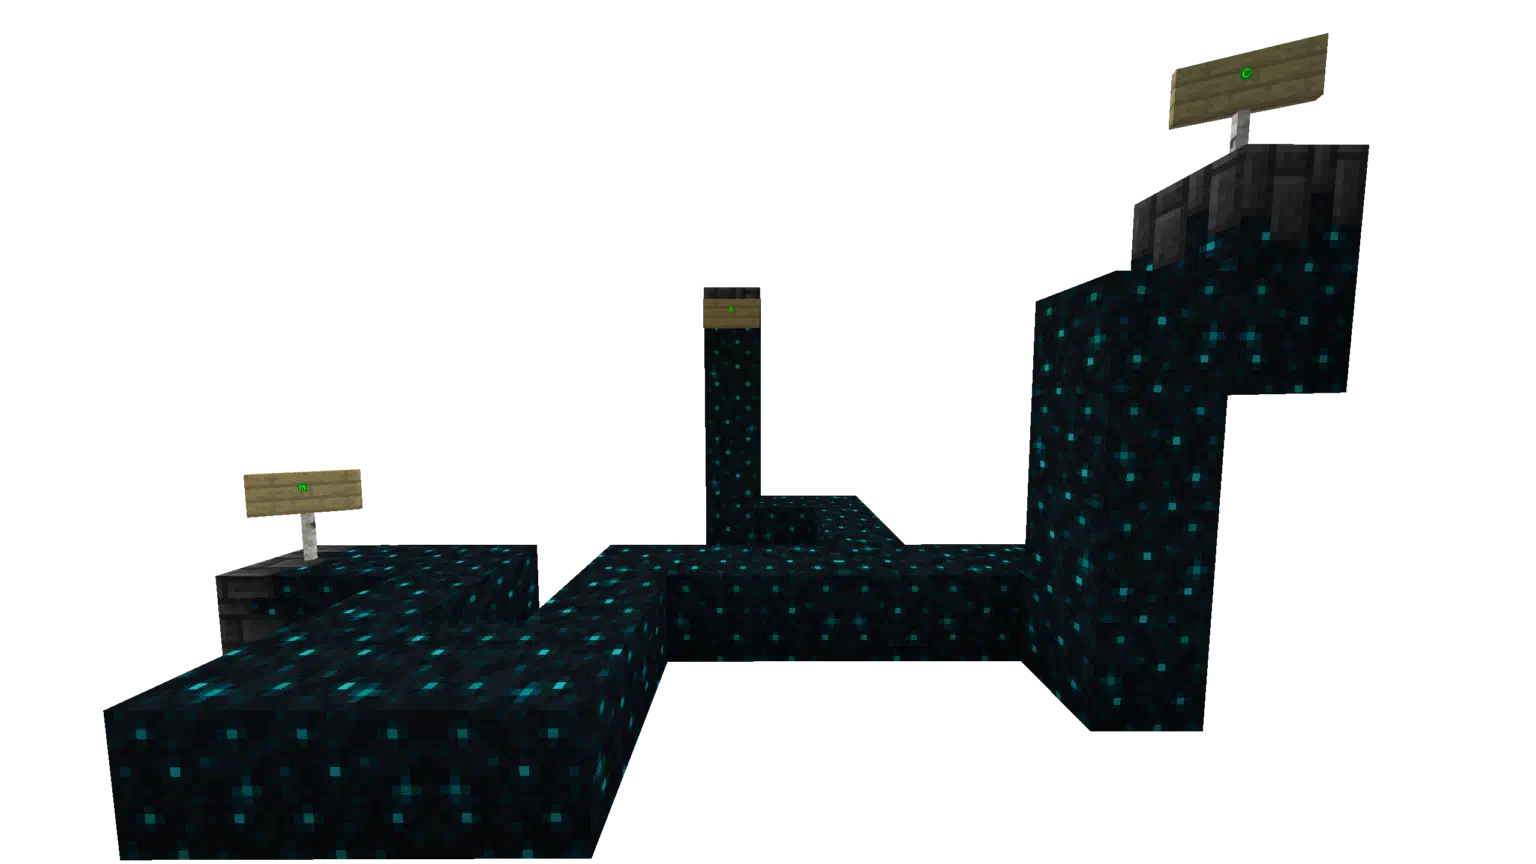
Example #2, Abstraction. The signs read “A”, B”, and “C” from left to right.
An important concept to understand is that the soul conductor has no concept of the overall system. It makes decisions one block at a time, and has no idea if there are other soul conductors at the end of a sculk line.
Therefore, the system in example #2 operates the exact same as the simple system shown in example #1. The only difference is that each conductor has to travel farther to reach the sculk block connecting all of them.
Since the sculk block in the middle is set up in the exact same (a 3-way junction), it has the exact same outcomes.
Randomization
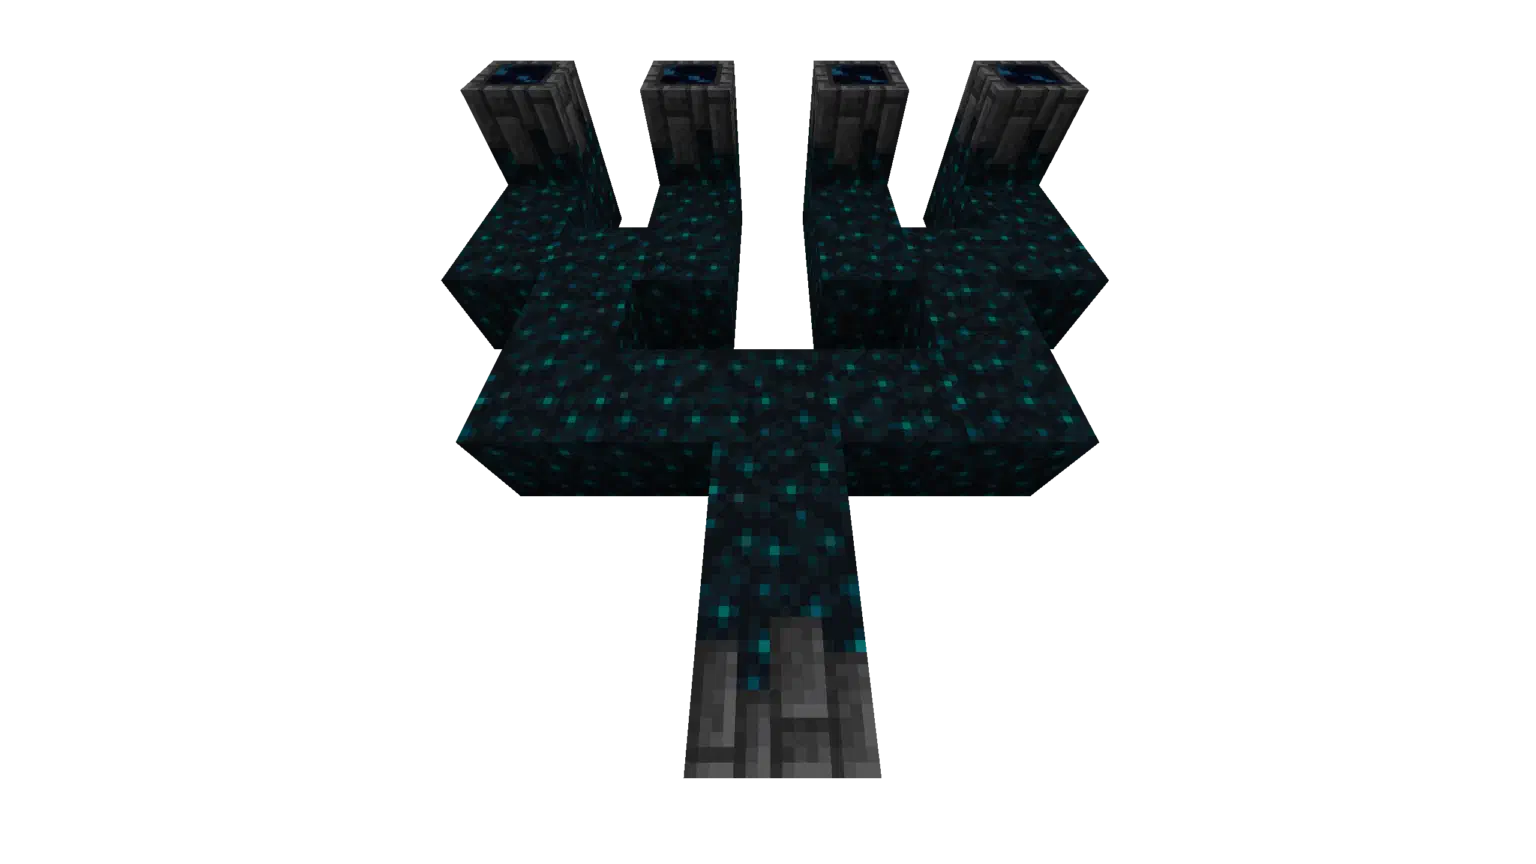
Example #3, Complex Randomization
Left and right priority being identical leads to some interesting behavior, as any choice between left & right is made completely randomly.
Entering the lowest conductor in example #3 makes you come out of any of the four exits on the top.
This is because at the first intersection, it randomly chooses between going left and right.
Then it chooses randomly again at the next intersection.
Basically, it’s a 50/50 combined with two other 50/50s.
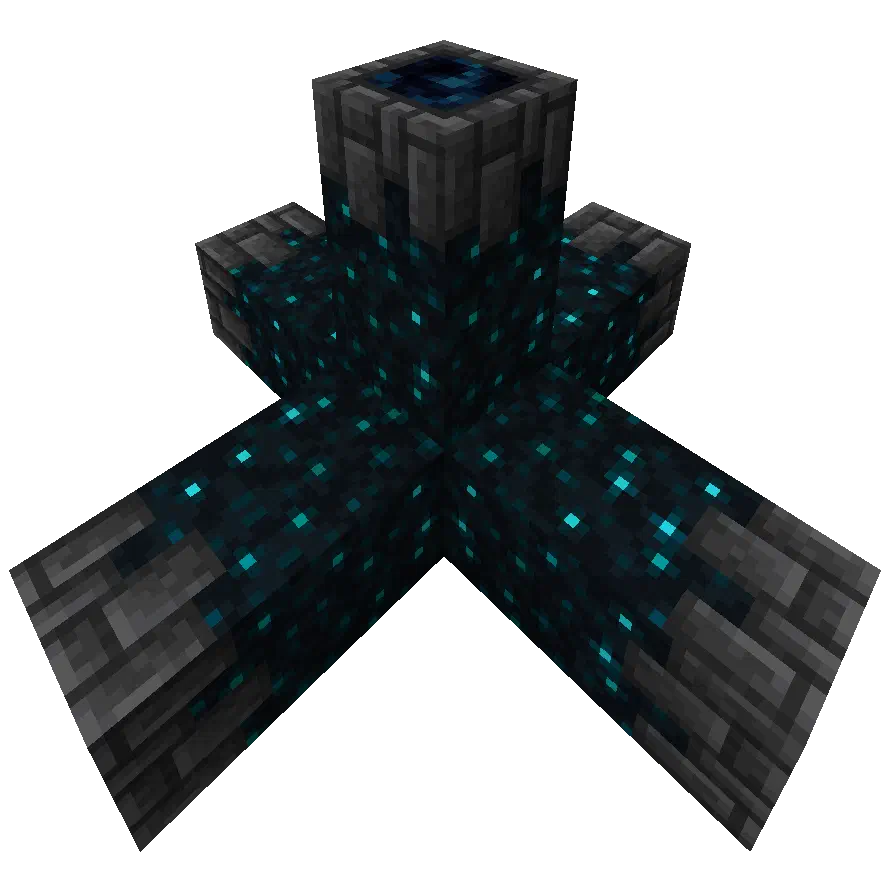
Example #4, Vertical Randomization
Entering the top soul conductor in example #4 sends you to any of the four bottom conductors.
This is because a vertical conductor has no clear rotation in the horizontal plane, so it randomly picks a direction as “forward”, whether it be north, south, east, or west.
Preserved Orientation and Backing
Example #5, Preserved Orientation. The signs read “A”, “B”, and “C” from bottom to top.
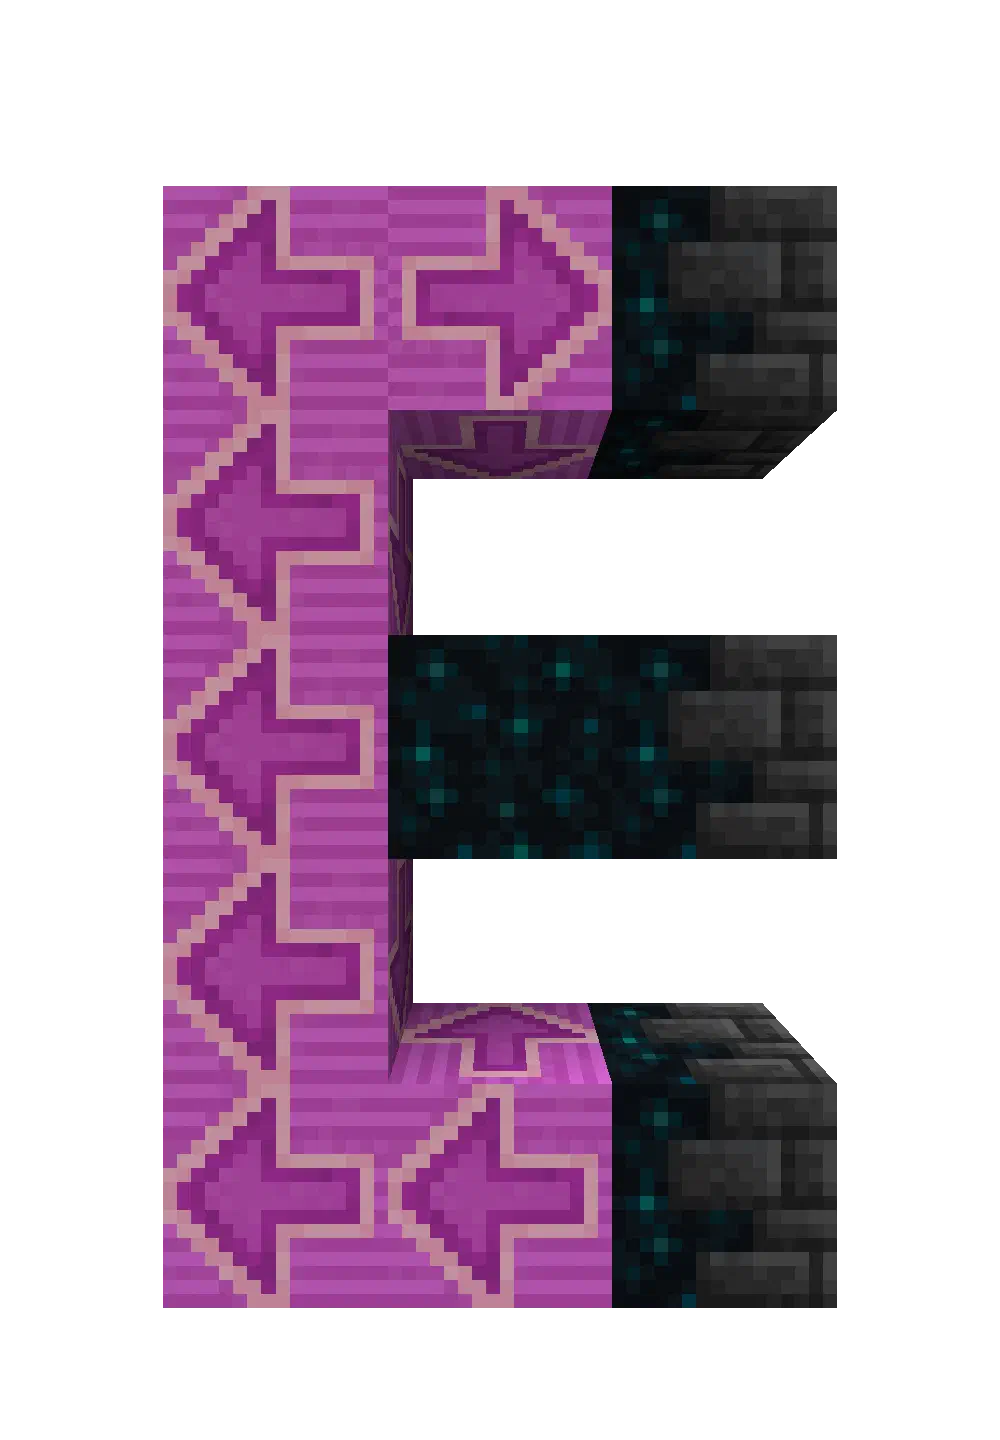
Example #5.1: The direction the signal travels from A to C.
One very complex feature that needs to be addressed is preserved orientation.
This is the idea that when traveling up, the signal sent from a conductor maintains its rotation. It is going upwards, but it is not facing upwards. It is still facing in the direction that it went into the upwards path in.
This is where the “backward” portion of the priority comes in. If you remember from the original priority listing, “backward” comes at the bottom of the list. However, the signal cannot “turn around”, nor can it pass through blocks it has already travelled through, in order to prevent loop cases.
So how is “backward” part of the priority? “Backward” only comes into play when going up or down from a certain orientation. In the example on the right, going into A begins to take you upwards, facing left (as the glazed terracotta arrows show on the right.)
Since the signal is facing away from B’s path, B counts as moving “backwards”. Because of the rarity of this case, it is at the bottom of priority, meaning that:
- A always brings you to C. (Up > Backwards)
- This path is shown to the right with the magenta glazed terracotta.
- B always brings you to A. (Down > Up)
- C always brings you to A. (Down > Backwards)
Cutoff Priority
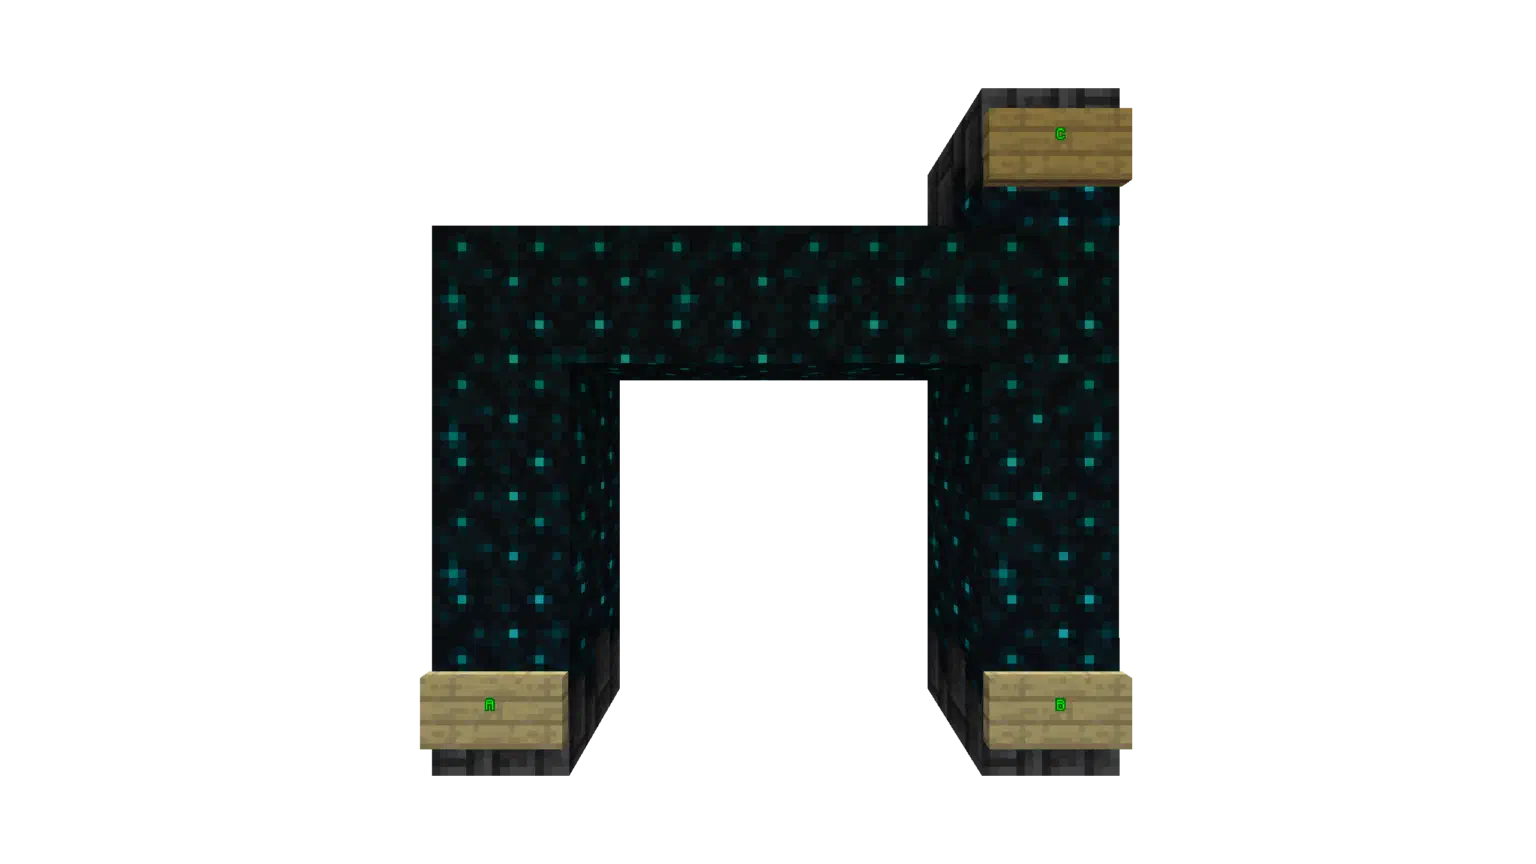
Example #6, Cutoff Priority. The signs read “A”, “B”, and “C” from left to right.
One of the more unintuitive portions of the priority system is cutoff priority.
The basic idea of this type of priority is that if the signal spots a conductor immediately connected to the chain it’s running through, it goes to that one. This does not go into effect if said conductor is separated by at least one block.
In example #6, when through A, you would expect to end up at B since it prioritizes going down (towards B) instead of up (towards C).
Instead, it ends up at C due to cutoff priority. C is directly connected so it ends the chain there immediately. If there are multiple direct cutoff points on one sculk line, the signal chooses randomly between them.
If C is raised by one block, then going through A sends you to B as originally expected.
This behavior is useful for creating conductors that function as an exit from one place, but also an entrance to an entirely different place.
In example #6:
- A always brings you to C due to cutoff priority.
- C always brings you to B due to down being prioritized over both forward and turning left/right.
- B always brings you to C due to cutoff priority.
More General Examples
This section is dedicated to a simple flood of examples. These will not be as in-depth as the others, they will simply state which conductors go to which.
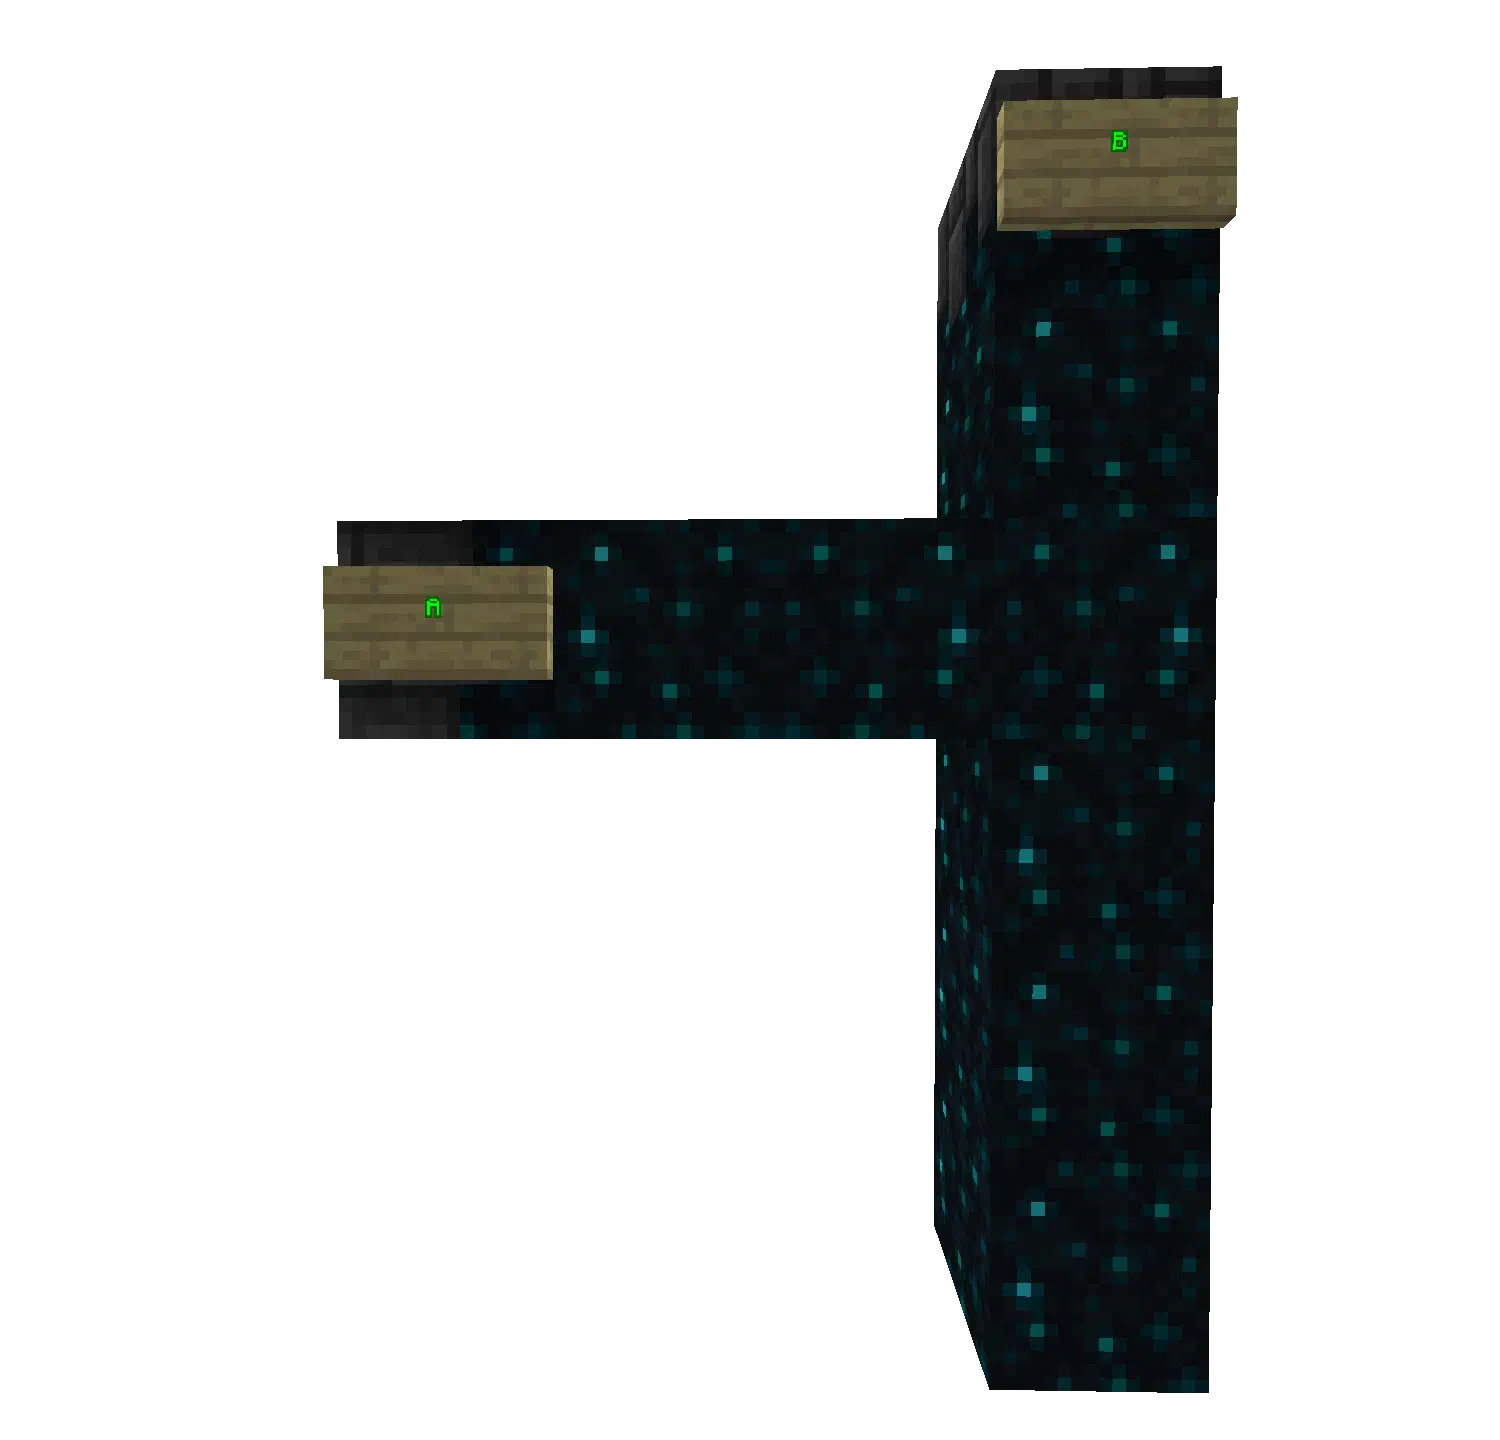
A ⟶ B, B ⟶ A
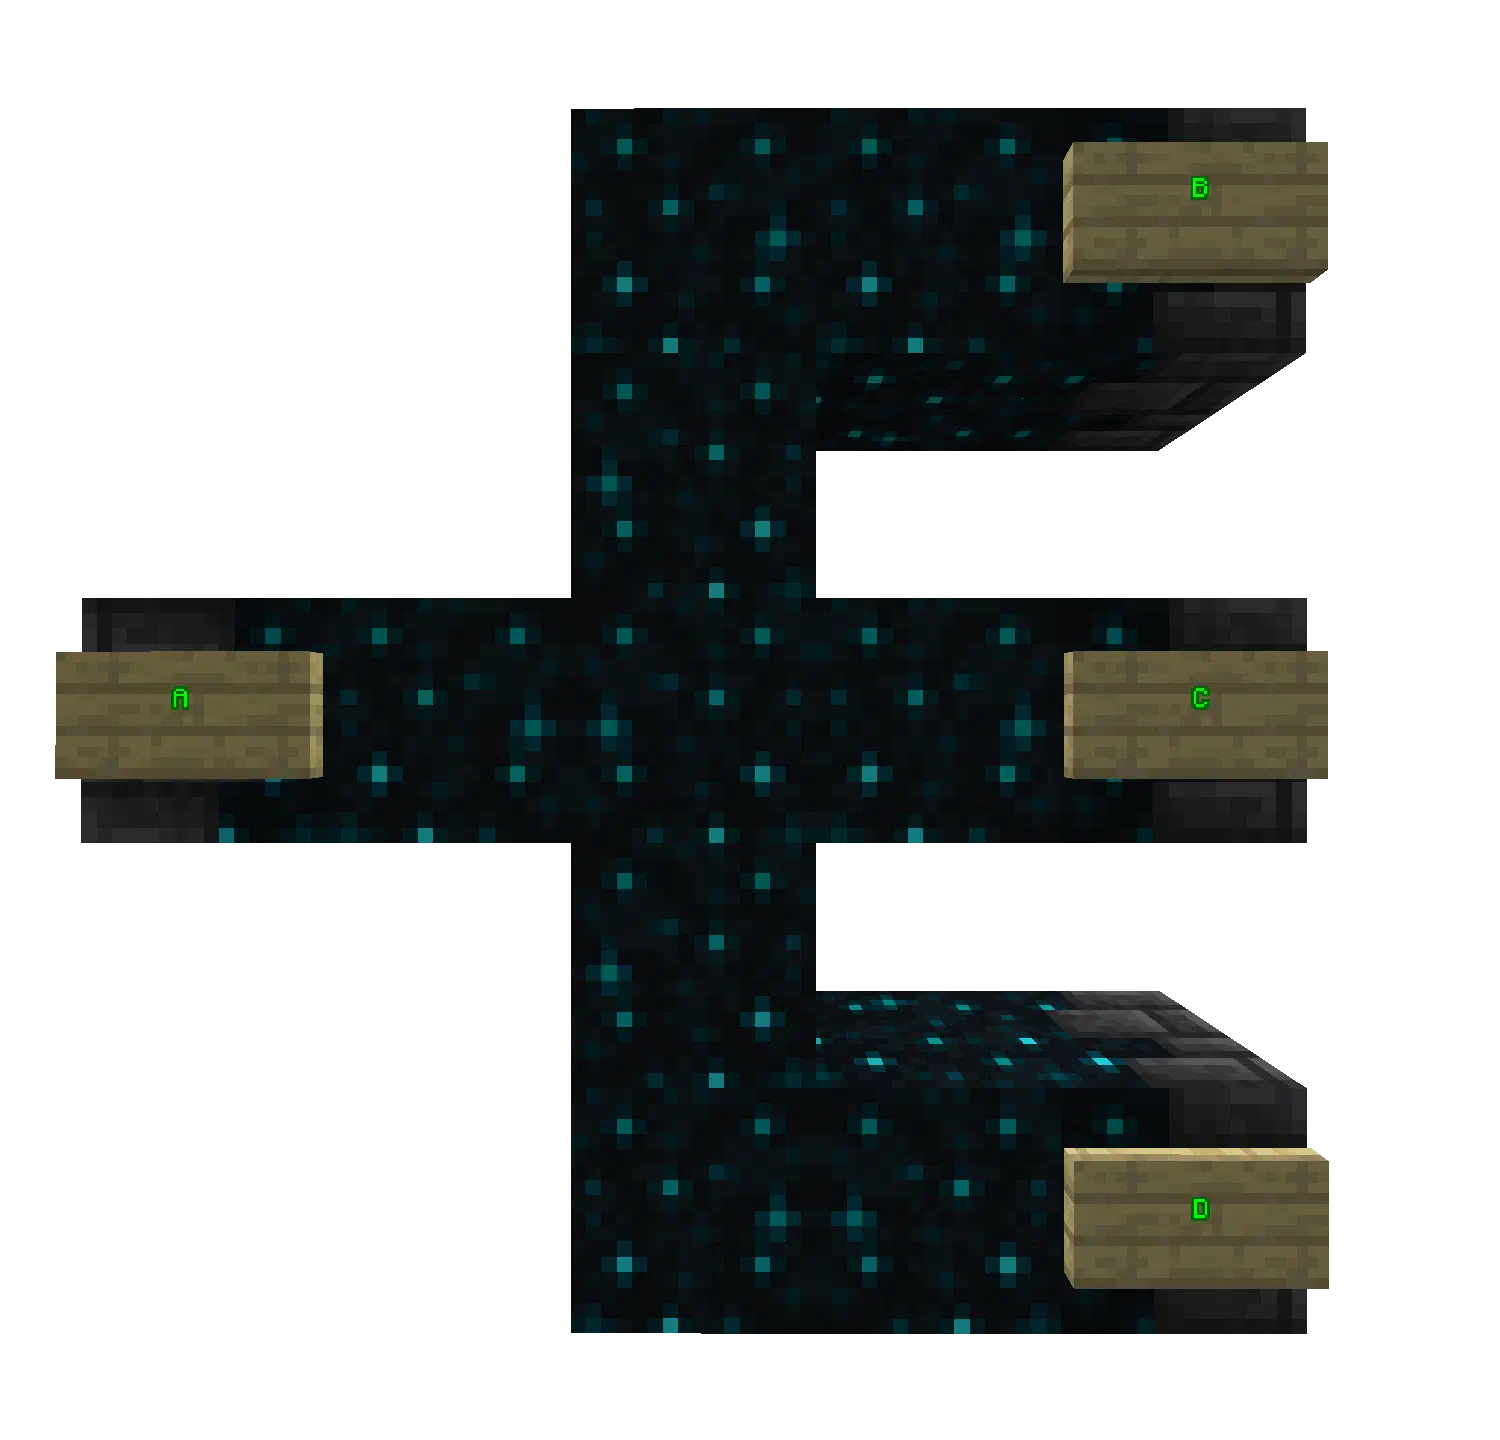
A/B/C ⟶ D, D ⟶ A
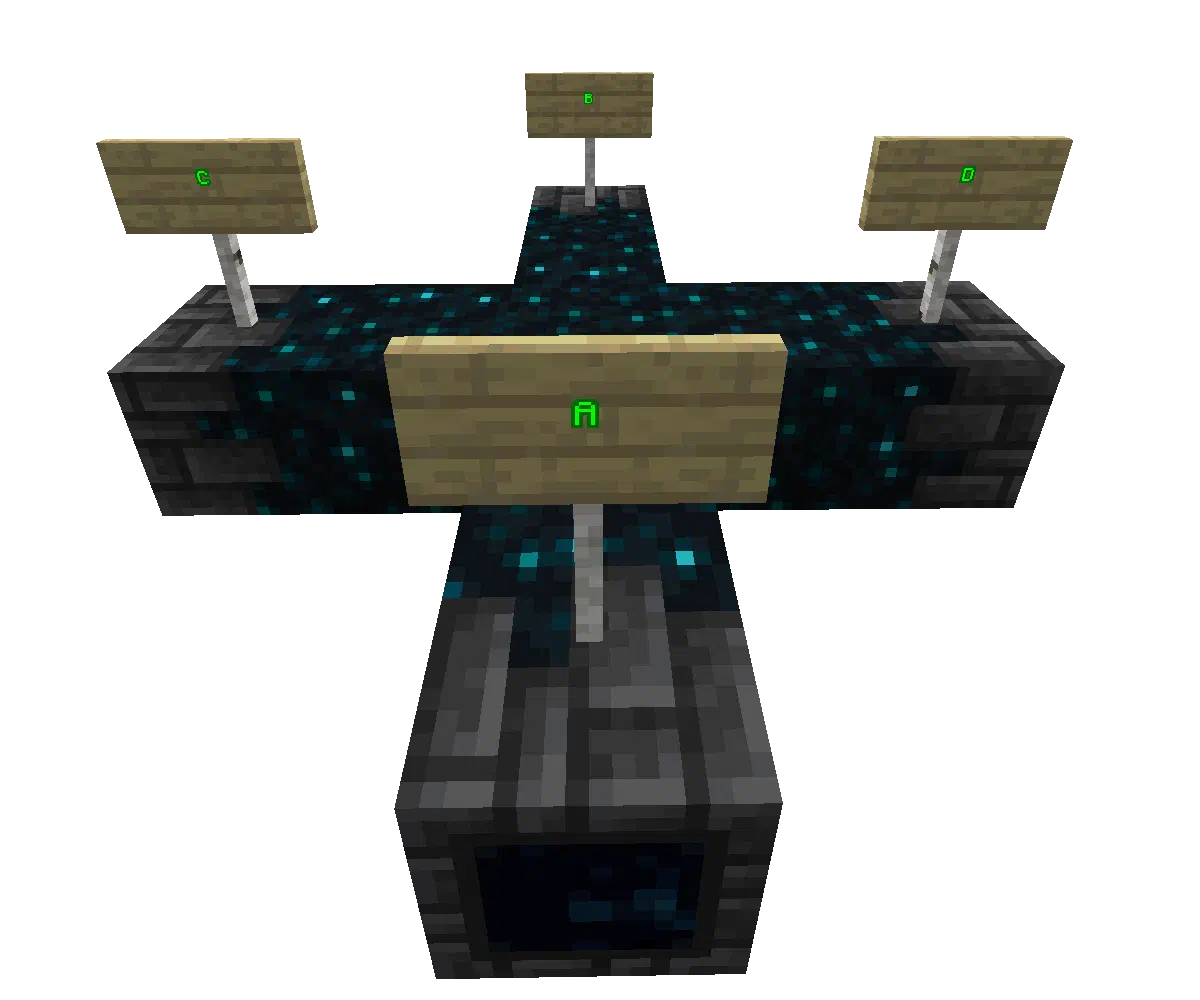
A ⟶ B, B ⟶ A, C ⟶ D, D ⟶ C
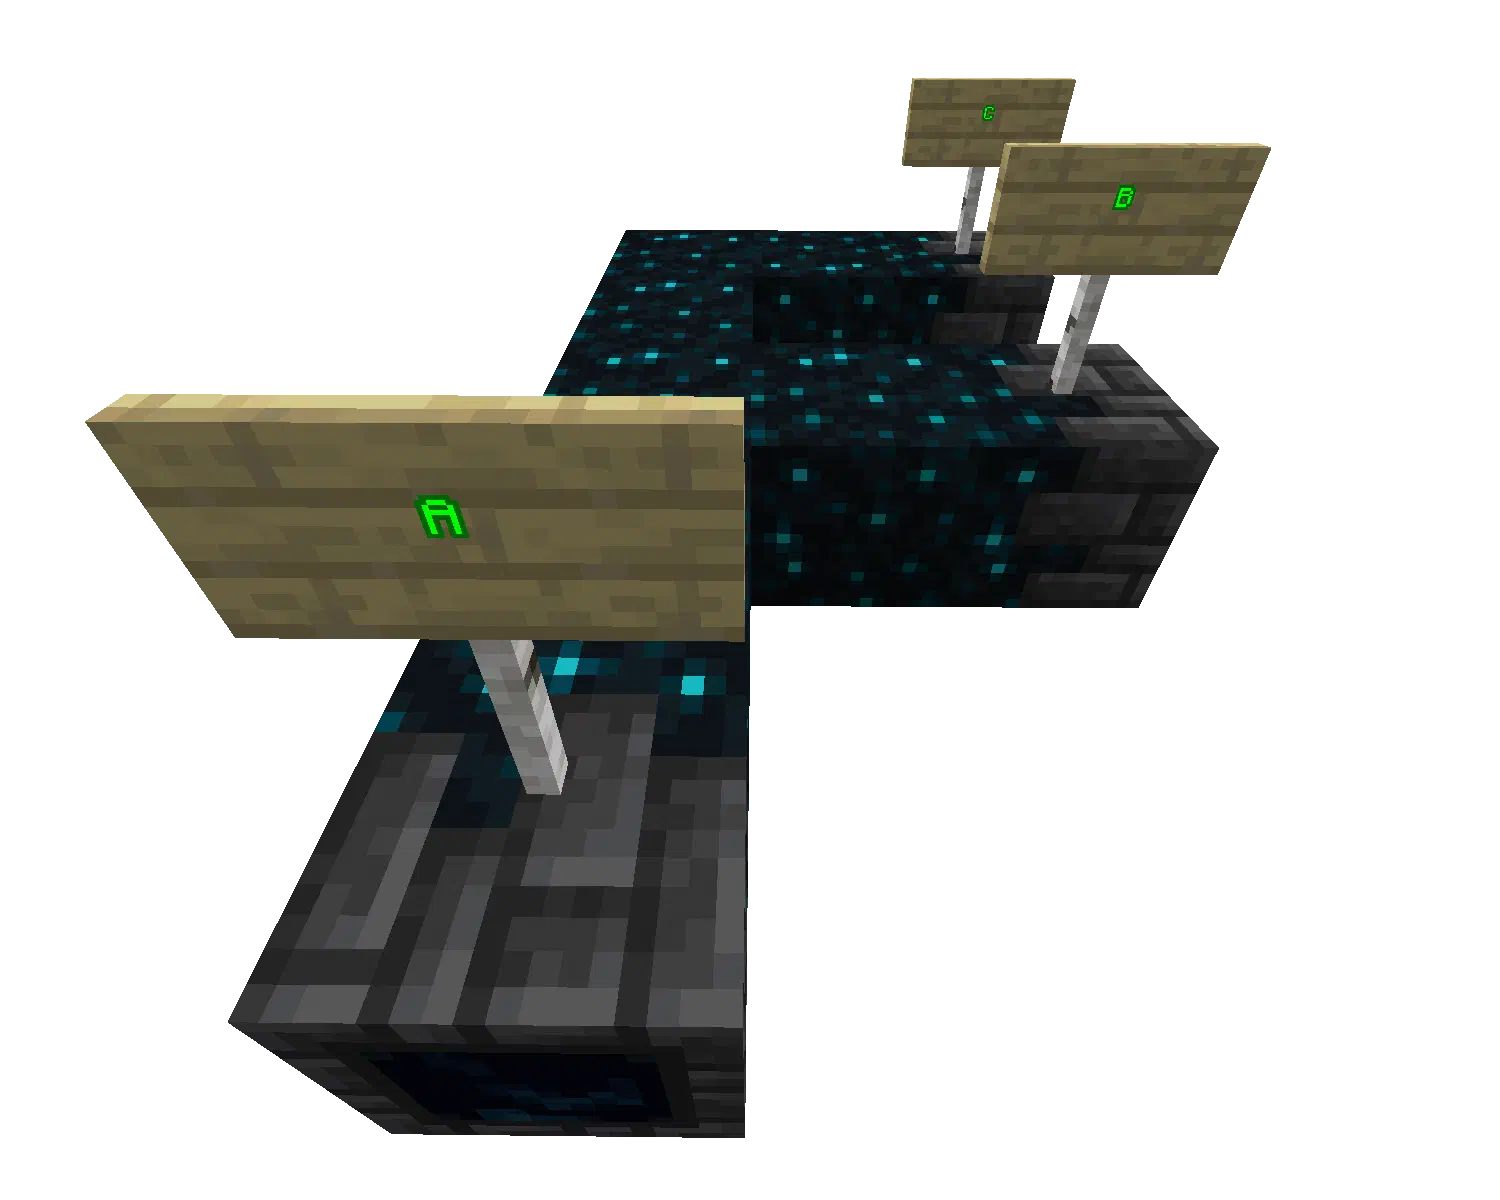
A ⟶ C, C ⟶ A, B ⟶ A or C
Redstone Integration
You can also combine various forms of redstone with this system to make some very fancy gadgets with observers and pistons!
Since sculk can be pushed by pistons, you can change the path that a soul conductor takes with a simple redstone signal. You can also power the soul conductor to disable it, preventing it from being used as an exit or entrance.
Attaching an observer to a sculk line with a soul conductor causes the observer to activate every time a signal passes through the sculk. This even works if there isn’t another soul conductor at the end to make a very fancy button!
It’s also important to note that the observer activation comes after the teleportation, not before.
You can use this behavior to create interesting contraptions, such as one-way conductors that detect the player moving through the sculk and then cut off their path back with a piston.
There are plenty of redstone applications both pistons and observers can bring, and I won’t spoil them all. Let’s just say that a device like the one below is very possible… you just need a bunch of redstone, pistons, and plenty of experience with cutoff priority.
Pick your destination, and then click on the conductor to send you to the selected one. It works both ways—even if the system is set to purple, you can still travel from the red destination back to the hub.
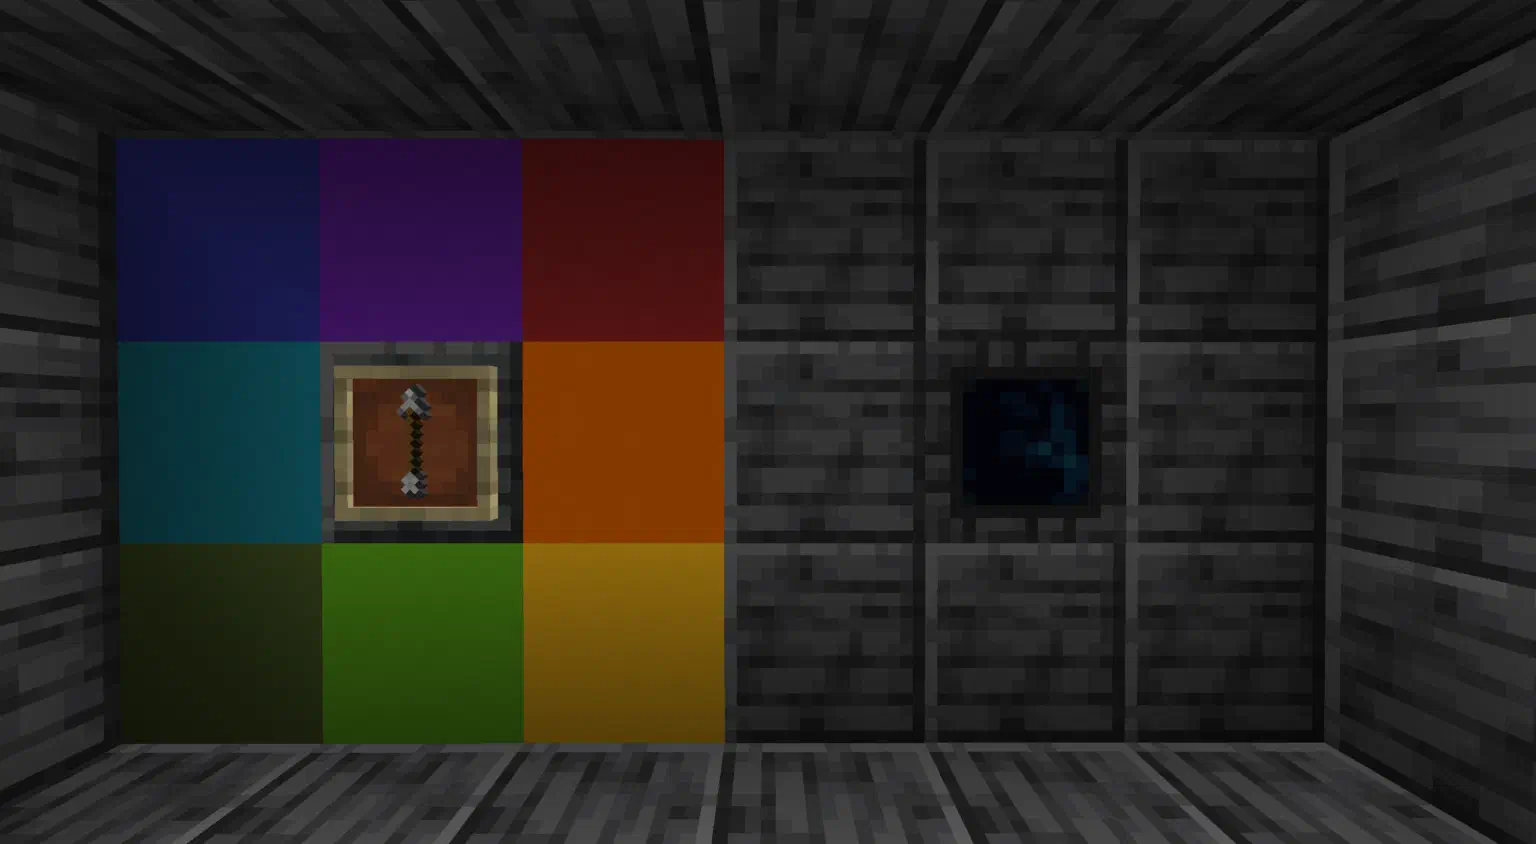
Good luck figuring out how to make this one!
Well, that’s all I have for this article. Hopefully this helped you understand some of the more complex aspects of soul conductors, and as always, join our discord if you have any more questions. (Or if you’ve made some really awesome contraption you want to show off!)
History
| 1.3.2 | + | You can now “pick block” positional anchors, soul seers, soul conductors, and pottery tables by control+middle-clicking them | |
|---|---|---|---|
| 1.3.0 | + | Soul Conductor Redstone Toggling Soul conductors can now be disabled by powering them with redstone | |
| 1.2.2 | * | The soul conductor limit is now 2000, rather than 10000. This is to prevent excessive lag.
The soul conductor now warns you when you hit the limit, rather than failing silently | |
| 1.2.1 | * | Soul conductors now ignore doors | |
| 1.1.1 | * | Soul conductors now ignore trapdoors | |
| 1.1.0 | Beta 3 | * | There are now particles and sounds for multiplayer The limit is now 10,000 blocks instead of a measly 1,800 Tweaked the behavior of exit conductors
There’s also a fun new advancement for travelling more than 1000 blocks in one go using a soul conductor called “Thinking with Portals”. |
| Beta 1 | + | A new block crafted from 2 echo shards Connecting two soul conductors with a line of sculk and clicking one end will teleport you to the other You can find out more about this feature in its guide article. Yes, it’s so complex it has its own guide article. | |